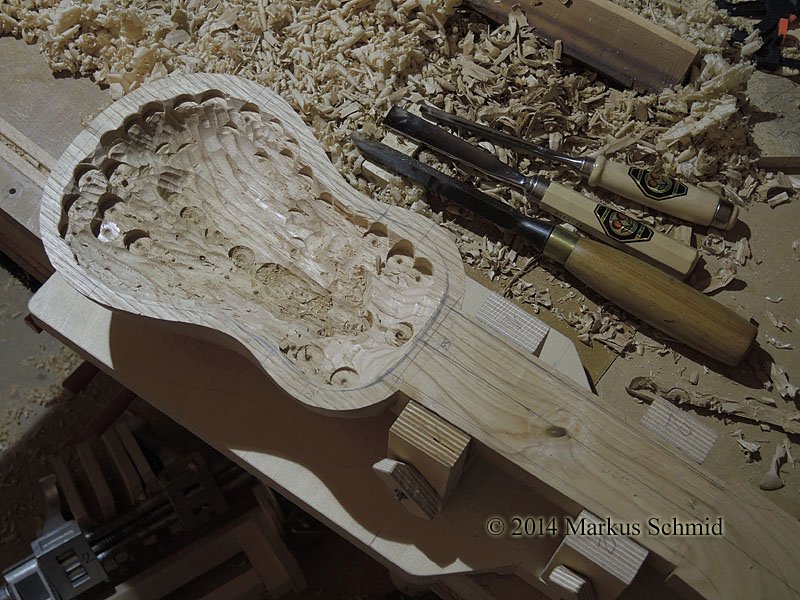
Charango 2

"El Canario", aka "Frieda's bikini"
  • A gift from Norberto de León Cabrera: one half of a piece of a chestnut trunc, here in Norberto's shed in  Borondes near Oviedo (Asturias, Spain) when I picked it up in summer 2012. The tree had been felled and cut in pieces in 2009.
  • After using the chainsaw to make some relief cuts Norberto removes the waste with a chisel. What a waste indeed! But longitudinal cuts on large pieces is a bit of a problem without adequately large equipment, and this is one of the ways how to skin the cat quite efficiently.
  • 2012 D70 5358
  • Further treatment with the chisel and the bandsaw leads to an acceptable weight for transportation (it went into my suitcase to take it home).
  • Back home I used my bandsaw (which is a bit bigger and more powerful than the one of Norberto) to cut the headstock to its approximate shape.
  • More substantial wood removal from the neck. I could have made a cradle in order to make the cut on the bandaw. But for just one charango it wasn't wrth the extra work I thought - until I wished a few months later I had some longer off-cuts at hand...
  • This is the shape in which I let it dry for two winters (RH gets normally down to 20% - 25% for at least two months)...
  • ... and this is how much I hollowed out the roughly shaped chunk of chestnut, so it could dry reasonably fast.
  • Then, 20 months later I made this workbench attachment which allows me to access the charango from all sides while carving.
  • In the early stages of carving I screw a base plate of birch plywood to the charango body. Later when the body is almost in its final shape and hollowed I screw the base plate to the neck.  I lined the bench extension with 60-grit sandpaper which helps a lot keeping the charango in its position without having to struggle thightening it down sufficiently.
  • For carving the waist and the shoulder it helps a lot mounting the charango to the side of the bench extension. All outside carving was done with a broad chisel and this small inexpensive spokeshave (works a treat!), and occasionally a rather flat 20 mm gouge (cut 4).
  • Once the outside carving got  close to its final stage I mounted the charango in this cradle for carving the inside of the bowl. The faces of the jaws are lined with 60-grit sandpaper.
  • Using the drill press I bore a few more holes close to the rim, which helps a lot starting the carving.  Chestnut is quite soft and easy to carve. The holes serve mainly as a depth guide and relief for carving, but not for removal of major quantities of wood.
  • These are the tools I used for carving the bowl:   - two mortise chisels, 8  and 14 mm. They work wonders in the end grain zones, especially close to the neck   - a 10 mm turning gouge (Two Cherries), also very good for carving end grain  - a 20 mm / cut 4 carving gouge (Two Cherries)  - a cheap 16 mm carving gouge which doesn't hold the edge very well. I'll have to replace it with adecent carving gouge 16 mm / cut 8  - 25 mm / cut 5 carving gouge (missing in this picture)  - 18 mm / cut 8 spoon gouge (missing in this picture)
  • After about one hour of carving I am ready to drill some depth guide holes, leaving the walls at about 13-15 mm.
  • 10 minutes later most holes are gone. Time to start measuring bowl thickness for further carving!
  • This is my simple but very effective thickness gouge.
  • For getting into the corners I use a normal carving gouge (here a 25mm / cut 5) and...
  • ...to finish the cut from the other side I use a spoon gouge (18 mm / cut 8).
  • When measuring the bowl thickness I write the results to the bowl and mark the spots that are close to the final thickness with a red circle, and those spots that have reached the final thickness get marked in solid red (not to be touched again by a gouge).
  • Measuring takes now more time than actual carving!
  • Once the whole inside was painted over and over with red marks I took the charango to the drill press which I loaded with a sanding hemisphere. This is a bit a dusty job which I did not enjoy at all, and except on the endgrain zones it did not speed up the process significantly compared to using only my heavy duty scrapers. In any case,  to get rid of the marks the sanding had left...
  • ... I had to use the scraper, with which I also removed the unevenness I created in the sandimg process!
  • The bowl in its final shape and almost entirely cleaned up. The thickness in the lower bout is 6mm, in the upper bout mainly 8 mm, and close to the neck 10 mm.